Installing a Patio Drainage System
Adding a garden patio can improve the aesthetic of your home while also creating a practical space for dining, relaxing and entertaining. However before you lay down any paving slabs, you should consider a patio drainage system. By ensuring the removal of standing water from a patio (which can happen as a result of heavy rainfall) a properly installed drainage system can help you to avoid bacteria growth and even insect infestations.
In this guide we offer an overview of the different drainage systems that are suitable for patios, as well as installation advice to ensure that you can enjoy the outdoor area for many years to come.
Linear Drainage Channels
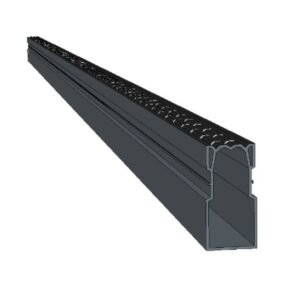
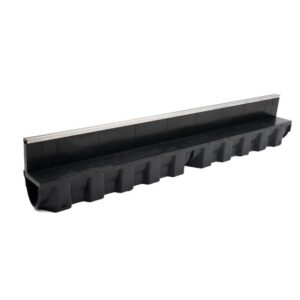
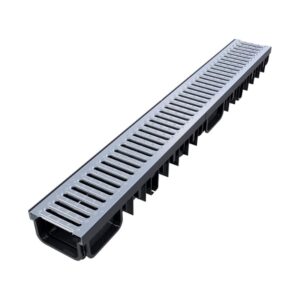
Linear drainage channels, also referred to as trench or channel drains, are an incredibly effective drainage option. Relatively easy to install and neat in terms of design, they connect to the main underground drainage system and can be used to tackle rainwater drainage problems in a wide range of areas, spanning from a yard, driveway or block paving outside a house, to much larger areas such as car parks or airport runways.
The most commonly used types of channel drains are either black plastic channels or composite channel drains that are paired with grate covers, however one-piece products and drains constructed from metal are also available.
Building Method
Although the method you choose to use may vary slightly depending on your drainage solution, below we’ve outlined the general stages that are usually involved when installing channel drains:
Stage 1 – Trench Preparation
Dig a trench for your channel drains and allow for at least 100mm backfill on either side of the drains, a base of at least 50mm of compacted aggregate, and a 1:200 fall (which is 5mm for every metre of drain section). Use a string line to indicate the finishing height of the grate, which should be 2mm lower than the surface level.
Stage 2 – Section Installation
Start installing your sections of linear drainage channels at the lowest point, which should be where it meets with the underground drainage system. If you need to cut down the size of any of your channel drain lengths you should ensure that cut pieces are installed at the end of the installation so that they are positioned at the farthest and highest point from the drain outlet.
It’s recommended that you install sections with the grate in place to ensure they’re properly aligned, and before placing the final section in the trench, fit it with an end cap.
Once you’re happy that the pieces are correctly joined together you can seal all of the locating grooves with a silicone sealant, and then connect the channel drain to the 4 inch drainage pipe.
Stage 3 – Securing Into PlaceÂ
Use a heavy duty masking tape to thoroughly protect the grates, and then pour concrete or tarmac into the trench on either side of the drain channels to secure them in place. Ensure that the level of the concrete is 2mm above the grates.
You then should wait for the concrete to dry for at least three days before applying any pressure or weight to the channel drains.
French Drains
A popular alternative to channel drains is the French drain system, which has been used for many years and is named after its inventor rather than the country. This method involves installing perforated pipes into a trench, allowing water to seep into the pipes and be directed away into a suitable outlet, alternative landscaped area, or a soakaway crate system.
Building Method
As it requires fewer materials to build a French drain system, it’s generally the more affordable option when it comes to patio drainage systems. To carry out an installation, you’ll need a shovel, measuring tape, perforated drainage pipe, a spirit level, bedding and drainage aggregate, landscaping fabric, topsoil, a tamper, rake, and a soakaway system if you’re using one.
Stage 1 – Trench Preparation
Dig a trench that’s wide enough to accommodate your perforated pipes and allow for a 25mm gap on each side. The trench also needs to have a depth of 500mm, and has a fall of at least 1 to 80.
Fill the trench with a 50mm layer of bedding gravel or aggregate, then cover the aggregate with a layer of non woven geotextile membrane that’s been cut to be slightly wider than the trench so it can overlap and stop silt and dirt from getting into the pipework.
Stage 2 – Pipe InstallationÂ
Place the piping into the trench, maintaining the required slope then wrap more geotextile membrane around the pipe and add a layer of aggregate on top, leaving a gap of approximately 80mm from the surface level of the surrounding ground. You can then fill that gap with topsoil, and level it out using the tamper and rake.
Other Considerations
Whichever patio drain system you choose, it is essential that it is installed at the lowest point of the patio and that it runs at right angles to the patio. If opting for a channel drain system, you will also need to ensure that you purchase products with a suitable load rating for the area it’s being installed.
Before you get started, you also need to check that you have a suitable – and permitted – connection to a drain or soakaway, and that you are not going to direct water into an area that could cause damage to any nearby building foundations.
Effective and Easy to Assemble
Here at EasyMerchant, we offer all of the products you need to easily and effectively remove unwanted standing water from your patio. Our easy-to-assemble drainage channels are ideal for homeowners looking for solutions for patios, driveways, paths, or garage thresholds and we stock all the accessories you may require as well as perforated pipes if you prefer to use French drain systems for your patio drains or yard drainage.
Our team is also on hand to offer expert advice if you are unsure about which drains system is the ideal solution for your patio drainage problems.
Shop Drainage Channel:Â
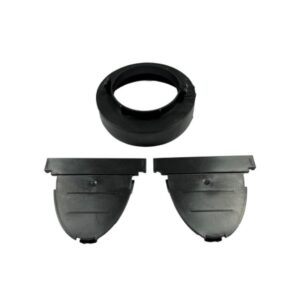
DekDrain Edge Slot Drain Accessory Pack
Pave-A-Drain Threshold Drain Channel – 2m
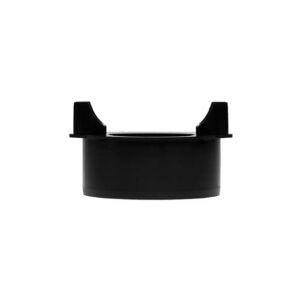
Shallow Channel Drain Bottom Outlet
Slot Drain Junction Unit
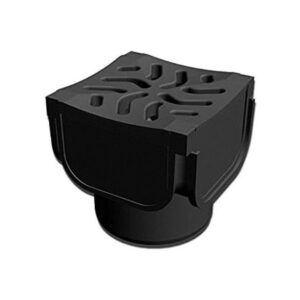
Shallow Channel Drain Corner Block
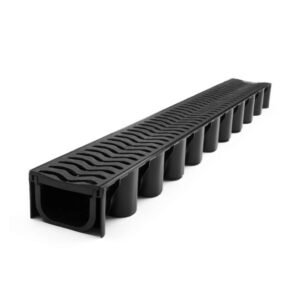
Plastic Shallow Drainage Channel x1m
DekDrain Slot Drain x1m
B125 Drainage Channel
Door Viewers
The door observer is a small optical instrument installed on the door of a residence, which is convenient for residents to observe the outdoor situation. Has become a necessity for home safety.
It is composed of a concave lens (objective lens) and a convex lens. The focal length of the objective lens is extremely short, it makes the outdoor person or object into an upright and reduced virtual image, which falls just within the focus of the eyepiece, and finally a reduced upright virtual image is obtained, which is exactly at the clear viewing distance of the human eye. Nearby, you can see the situation outside the door clearly.
To ensure the quality of this Reliable Solid Brass Door Viewers we have strict quality control from material processing, polishing, assembly and packaging. Extensive experiences, mature technology and professional service allows us to meet the different needs of customers of different regions.We produce Door Hardwares of various functions and styles, fits perfectly to all kinds of frameless shower enclosures. Special requirements and sizes are available. Please just feel free to contact us if you have any question. Our team is on call for 24/7 to provide the worry-free before/after-sale service.The Door Hardware produced by our company includes door viewers, Door Hinges , Door Stoppers, Door Holders, Door Guards , door selectors, Door Hang Wheels and other series of hardware products, which can meet the installation needs of all building materials.
Digital Door Viewer,Door Eye Viewer,Door Peehole Viewer, brass door viewer,peehole for home
Leader Hardware Manufacturer Limited , https://www.leaderhardwarecn.com