chrome plated, and other finished are offered such as polish nickle,bronze,oil rubbed bronze(ORB), etc.
Sensing Distance
12-18cm (adjustable)
Power Supply
AC 220V (50/60 HZ), DC 6V 4 AA alkaline battery
Power Consumption in static
≤0.5mw
Water Temperature
0.1-80 degree
Environment Temperature
0.1-45 degree
Suggest Water Pressure
0.05-0.6Bar
Switching Time
<0.7s
Operation Consumption
<60uA
Overall Power Consumption
<0.5W
Life Cycle
500,000 times on/off
Water supply pipe size
DN15 (G1/2")
Water flow
8L/min
Low Battery Indicator
Red Led flash
Warranty
5 years
Round Faucet,Bathroom Round Faucet,Round Handle Faucet,Modern Round Faucet KaiPing HuiPu Shower Metalwork Industrial CO,LTD , https://www.hp-shower.com
Type
Faucet
Installation
deck mount
Material
brass
Components
Faucet, relevant accessories
Treatment
Polished
Surface finished
Function
Applied in hotel,home,hospital,public etc
Certificate
CE & ISO9001
MOQ
100pcs(samples are available)
Packaging
According to customer's requirement
Sample time
7-10 days, depends on product style and workmanship
Sample fee
Paid by customer, prepay
Freight charge
Paid by customer, prepay
Delivery time
30-35days
Payment term
T/T, Western Union
Other
1.We provide one step service, design, production and packaging
2.Top quality, competitive price and good service
3.OEM service offered, our own brand also can be printed
At Leader Doors, we know that even the tiniest details can make all the difference when it comes to home improvement. Replacing door hinges might seem like a minor task, but it can dramatically improve your doors' functionality and aesthetics. Our detailed guide will walk you through the entire process, ensuring your doors operate smoothly and securely.
No matter if you're a seasoned DIY enthusiast or a beginner taking on home improvement projects for the first time, our straightforward instructions will help you achieve professional-grade results with minimal effort.
Here's what we'll cover:
- Why hinge pins come loose
- How to identify if your door hinges are loose
- Techniques to fix stripped screw holes
- Step-by-step instructions for replacing door hinges
### Why Do Hinge Pins Come Loose?
Over time, frequent use can lead to wear and tear, causing hinge pins to loosen. Poor installation or alignment issues can also contribute to this problem. Environmental factors like humidity and temperature fluctuations can cause expansion and contraction of the door and hinges, leading to pin movement. Additionally, low-quality hinges often lack the necessary friction to remain securely in place.
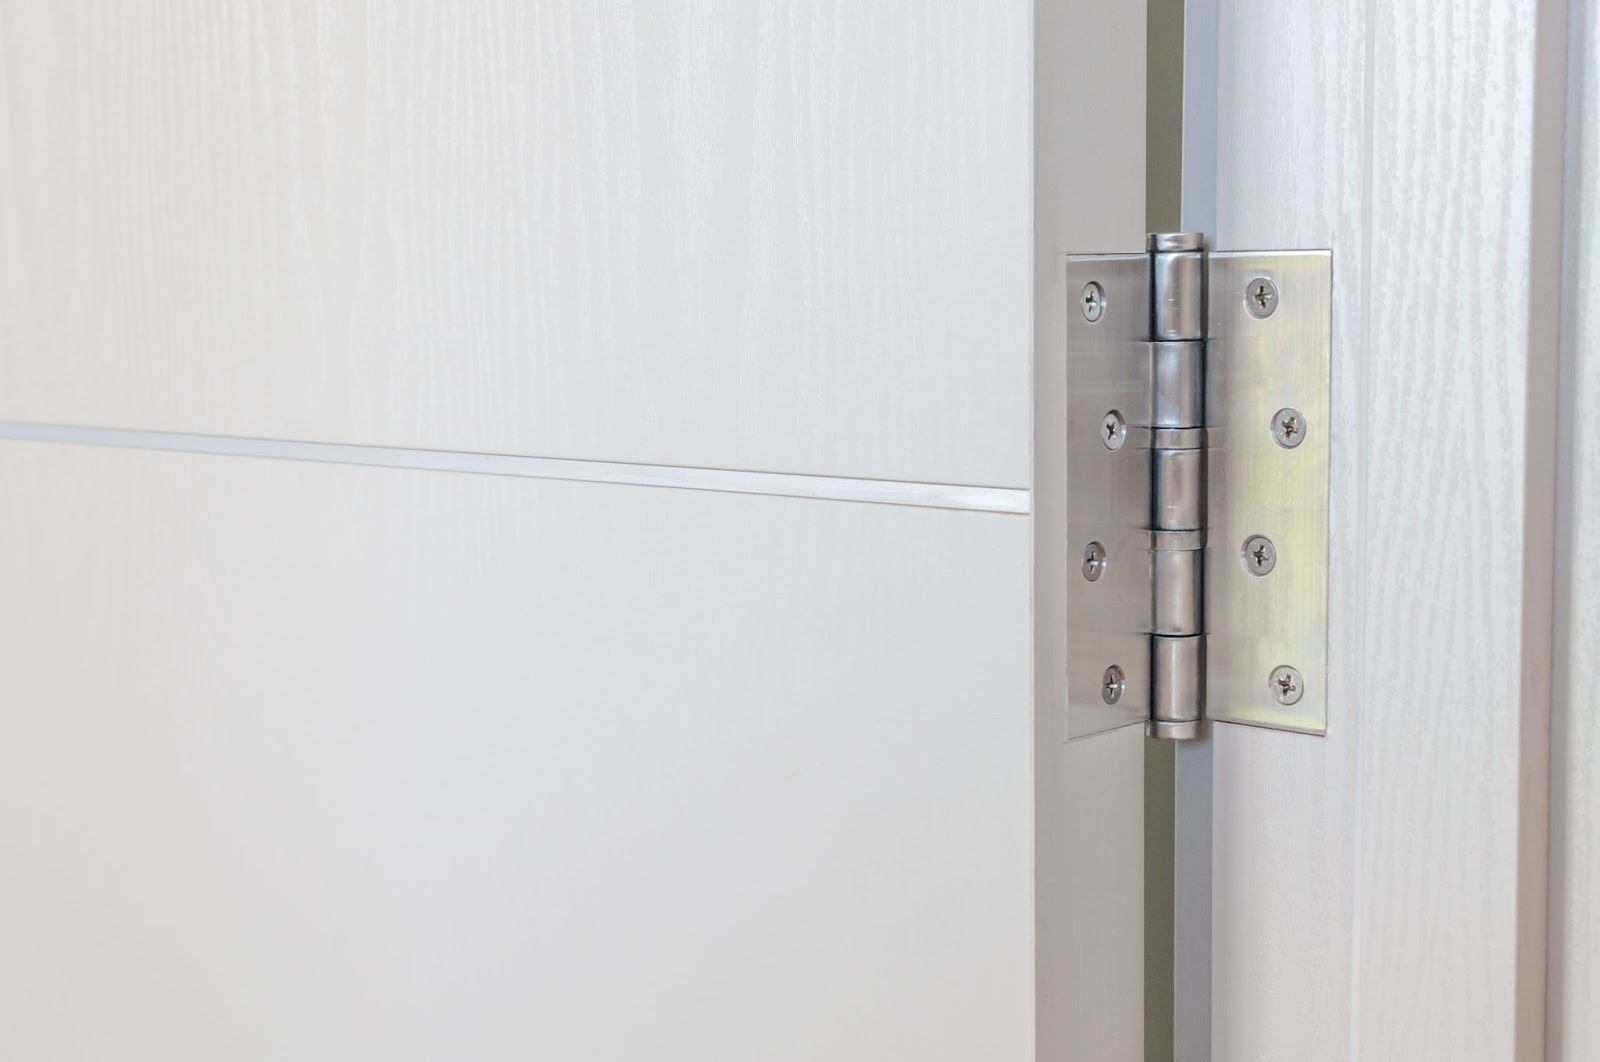
### Checking If Your Door Hinges Are Loose
Before diving into replacing every hinge in your home, it's wise to check if your hinges are actually loose. This will help you determine whether the issue lies with the hinges themselves or other aspects of your door's hardware.
To check for loose hinges, open and close the door slowly, listening for any unusual noises or noticing any abnormal movements. Then, hold the door by the knob or handle and gently lift it upward. If you notice any movement around the hinge screws, they likely need tightening. Inspect the hinges for gaps between the hinge leaves and the door frame. You can also try tightening the hinge screws gently with a screwdriver—if they move freely without resistance, they aren't properly secured and may need tightening or replacement with screws that provide better friction.
### Fixing Stripped Screw Holes
If you find that your hinge screws are loose and won't tighten with a screwdriver, it's possible that the holes they're screwed into have become stripped and can no longer hold the weight of the door effectively. Fortunately, there's an easy, budget-friendly solution before you decide to replace your hinges.
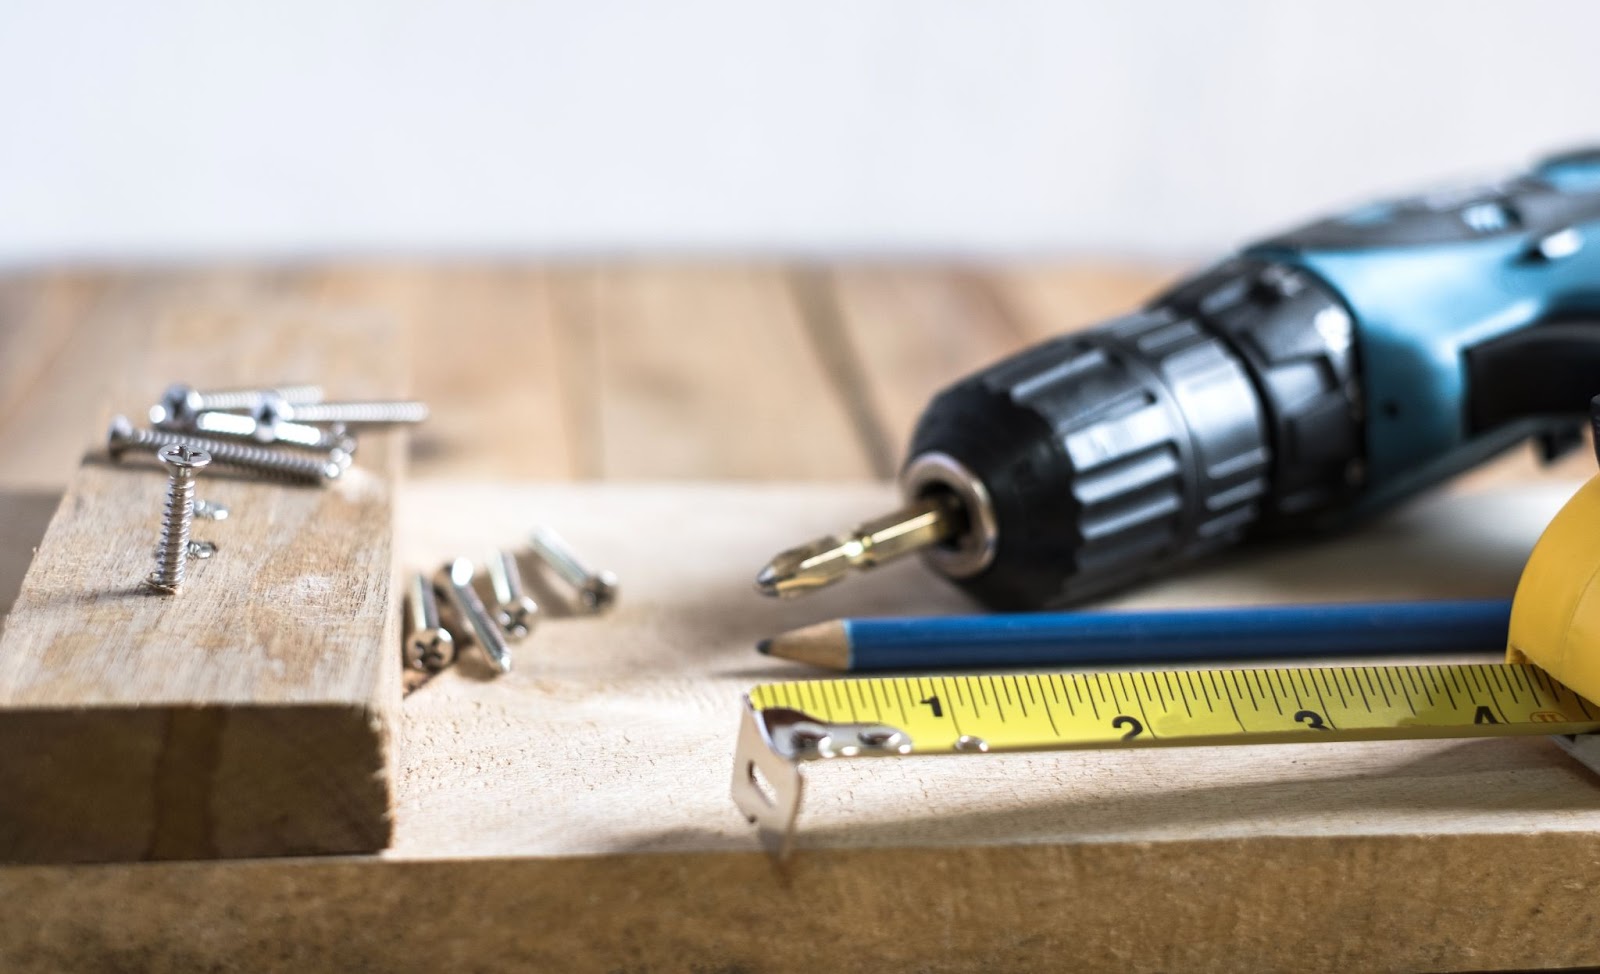
#### What You'll Need:
- Blocks of wood or a sturdy doorstop
- A screwdriver
- A power drill
- A drill bit
- Matchsticks or wooden dowels
- Wood or carpenter glue
- A hammer
#### Steps to Fix Stripped Screw Holes:
1. **Secure the Door**: Before starting work, it's a good idea to keep the door stable and open while you're working on it. Use a sturdy doorstop or some wood blocks to prop the door open.
2. **Remove Old Screws**: Unscrew the old screws from the doorframe using a screwdriver and discard them. If the screws attaching the hinge to the door are still in good condition, you can leave the hinge attached. Otherwise, remove and dispose of them.
3. **Measure the Dowels**: Before drilling, ensure that the hole size matches the diameter of your wooden dowels or matchsticks. Resize the dowel to fit the depth of the hole you need to fill. Insert the dowel into the first hole and mark how far it goes with a pencil. Pull it out and cut it into pieces about 1 inch long. Repeat this for all the holes you need to fill.
4. **Drill and Insert Dowels**: Use your power drill to clean up the existing hole and prepare it for the wooden dowel. Apply a small amount of wood glue to the base of the dowel or matchstick and fit it into the hole. Lightly hammer it in. Trim any excess that sticks out of the hole and sand it down so it sits flush with the frame.
5. **Pre-Drill and Install New Screws**: Once the glue has dried, drill a pilot hole in the center of the dowel before installing the new screw. Mark the wood through the openings of the hinge for accurate positioning. Drill the pilot holes, align the hinge with the holes, and start the new screws. Avoid overtightening to prevent stripping the hole again.
### Replacing Door Hinges
If you've determined that the issue lies with the hinges themselves, or you're simply looking to update them to match other door hardware, replacing them might be the best option.
#### Choosing the Right Hinges
Before purchasing new hinges, carefully consider which type suits your door best. Different types of hinges serve different purposes:
- **Flush Hinges** are highly versatile and work well for flat surfaces like cabinets or interior doors.
- **Tee Hinges** are durable and ideal for external doors like wooden doors or garden gates.
- **Parliament Hinges** are great for doors that need to open fully, up to 180 degrees, such as emergency or fire doors.
- **Double Action Hinges**, also known as spring hinges, allow a door to open 180 degrees in both directions and automatically return to the center.
#### What You'll Need:
- New hinges
- Blocks of wood or a sturdy doorstop
- A power drill
- A screwdriver
- A tape measure
- A pencil
#### Step 1: Secure the Door
Start by propping the door open to expose the hinge. Use a doorstop to keep it steady while you work.
#### Step 2: Measure Accurately
Check that your new hinges match the size and shape of the old ones. Measure where the hinges should go—typically 7 inches from the top and 11 inches from the bottom of the door frame. Mark these spots with a pencil.
#### Step 3: Remove Old Hinges
Begin with the top hinge. Remove the screws while keeping the hinge in place. Pull the hinge leaves away from the door and the jamb, checking the condition of the underlying wood. This is also a good chance to repair any stripped holes or fill unnecessary ones.
#### Step 4: Install New Hinges
Place the new hinge in the desired position and secure it with a screwdriver or drill. Insert the hinge pin in the middle. Repeat this for the remaining hinges.
#### Step 5: Test the Hinges
Remove the doorstop and test the new hinges by opening and closing the door a few times. Ensure the hinges are tight and the motion is smooth.
### Shop High-Quality Hinges at Leader Doors
At Leader Doors, we pride ourselves on offering premium hinges and accessories that meet the highest standards of quality and durability. Our collection includes various styles and finishes, ensuring you find the perfect match for any door in your home. Each hinge is meticulously crafted using robust materials, providing reliable performance and smooth operation for years to come.
Whether you're replacing old hinges or installing new doors, our hinges guarantee a seamless and secure fit.
For more helpful guides, visit our blog:
- How to Hang a Door
- How to Make Your Front Door More Secure
- How to Change Your Door Lock
At Leader Doors, we're here to help you transform your home with confidence!
Prodcut Description
Parameters